
How Litmus Personalize helps you get the most out of your data
Plug and play, it's that easy. We'll show you how we put your data to work in Litmus Personalize.


Let's go

Learn how it works
First, it’s important to note here that your customer’s PII is not stored with Litmus. It passes through and we do not collect or store your customer’s personally identifiable information.
Step 1
Merge CRM data & send email
Generate tag & add to HTML
Create dynamic images
Connect a content source

Once your data source is connected, you’ll be able to create dynamic images, apply custom business rules, and create 1-to-1 experiences for every subscriber with a single HTML tag. This will be completely controlled by you so it can be designed with your brand standards in mind.
Next, simply generate the HTML tag and add it to your email code. That one tag will generate as many personalized images as you’ve set, given the content and data merged.
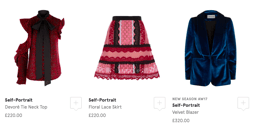
In this example, you can see how Brian, Mike, and Kate will all get their very own individualized email with their specific preferences in mind.


See Mike's email
See Brian's email
See Kate's email
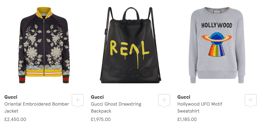
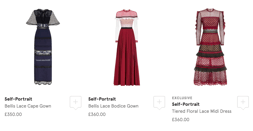
Kate has been wanting a new outfit for an event she is attending.


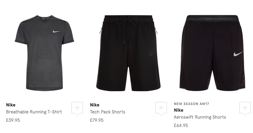
Brian has been shopping for some athletic wear to help him get into better shape.
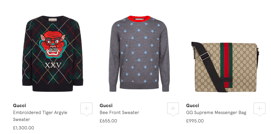
Mike is trying to decide between a jacket or a sweatshirt.
See Mike's email
See Kate's email
See Brian's email
Learn how it works
Step 1

Set up your data
Step 2
Activate your personalized content
Step 3


Social Feeds
Social feeds like Instagram and Twitter populate the latest from your social channel the moment an email is opened.

User-Generated Content
User-generated content platforms, like Yotpo, or Olapic. These help to bring in your latest and greatest user content and reviews.

OPEN SOURCE APIs
Any open source API. These are content feeds that are published on the internet and shared freely. Weather, TV schedules, currency conversions, even travel information like flight status.
Other content sources you can connect to Litmus Personalize include:


The Litmus Personalize platform can ingest any .csv, .txt, xml, or json file types. These files act as “Content Sources” that contain all the data required to design personalized elements for your emails. For example, your content source feed could include product details, availability, pricing, sale status, and other elements. If you’re in the B2B space, you could connect a feed that contains your top thought leadership content, popular events, and more.

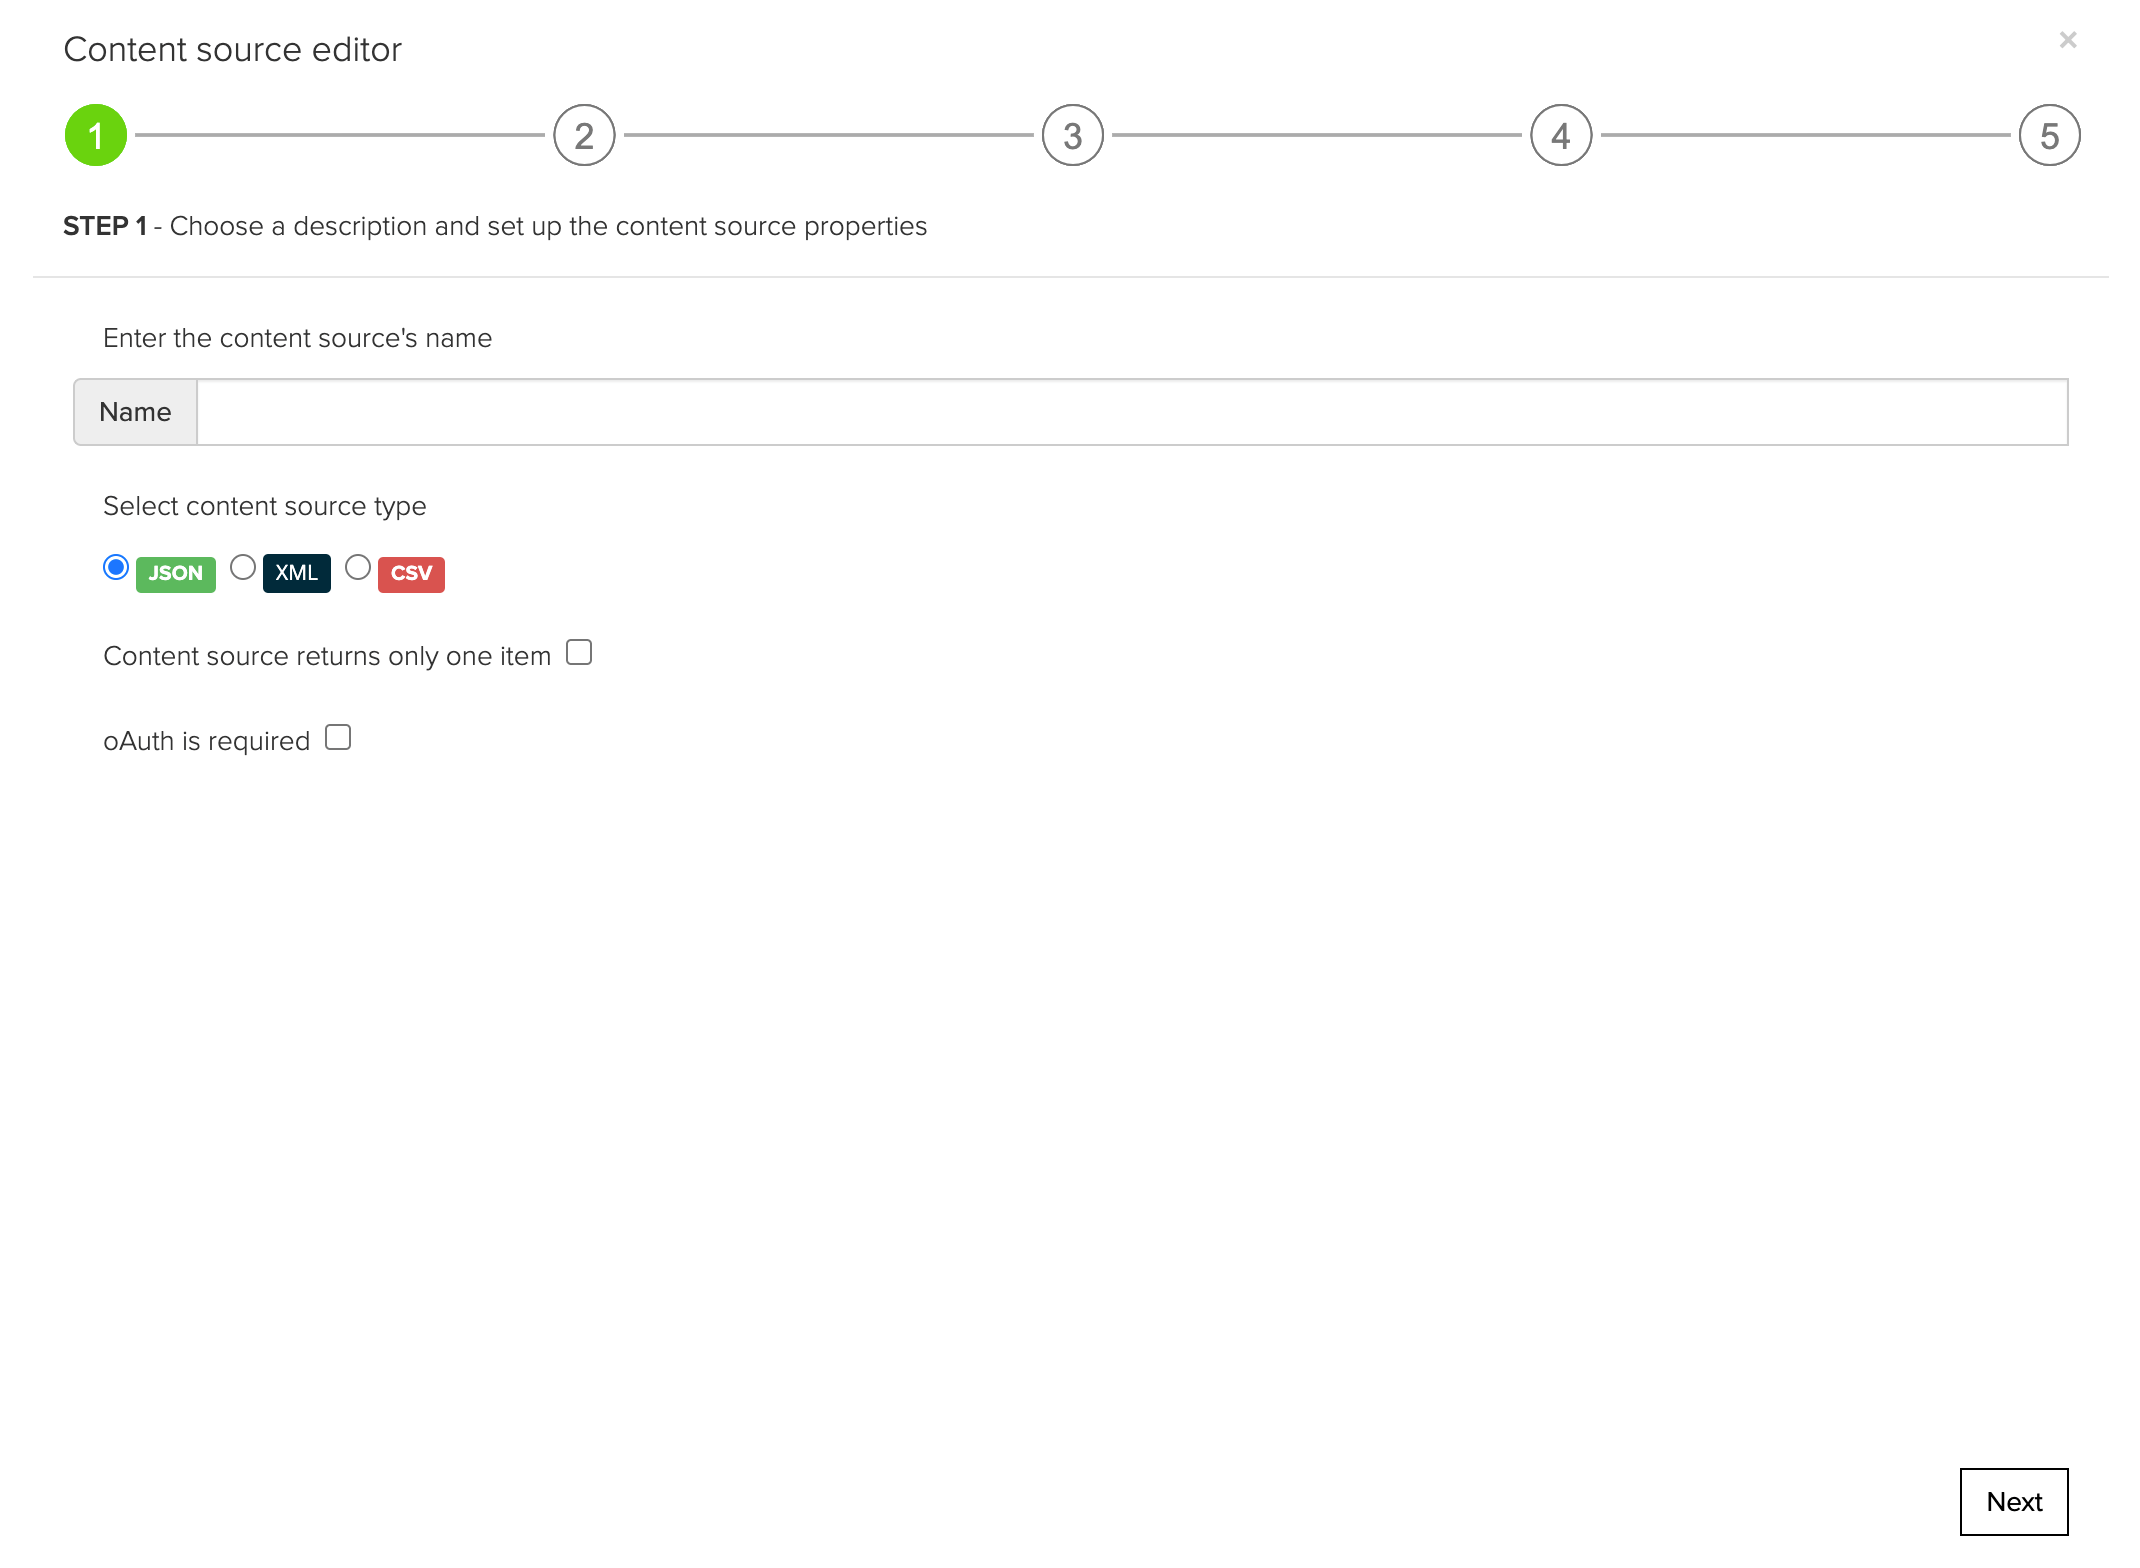
Select Content Source then add a name and select the content type.
Direct us to where your data is hosted and make that connection.
Litmus Personalize utilizes your data to complete your personalized images.
Set up your data sources
Step 2
WHERE IS MY DATA?
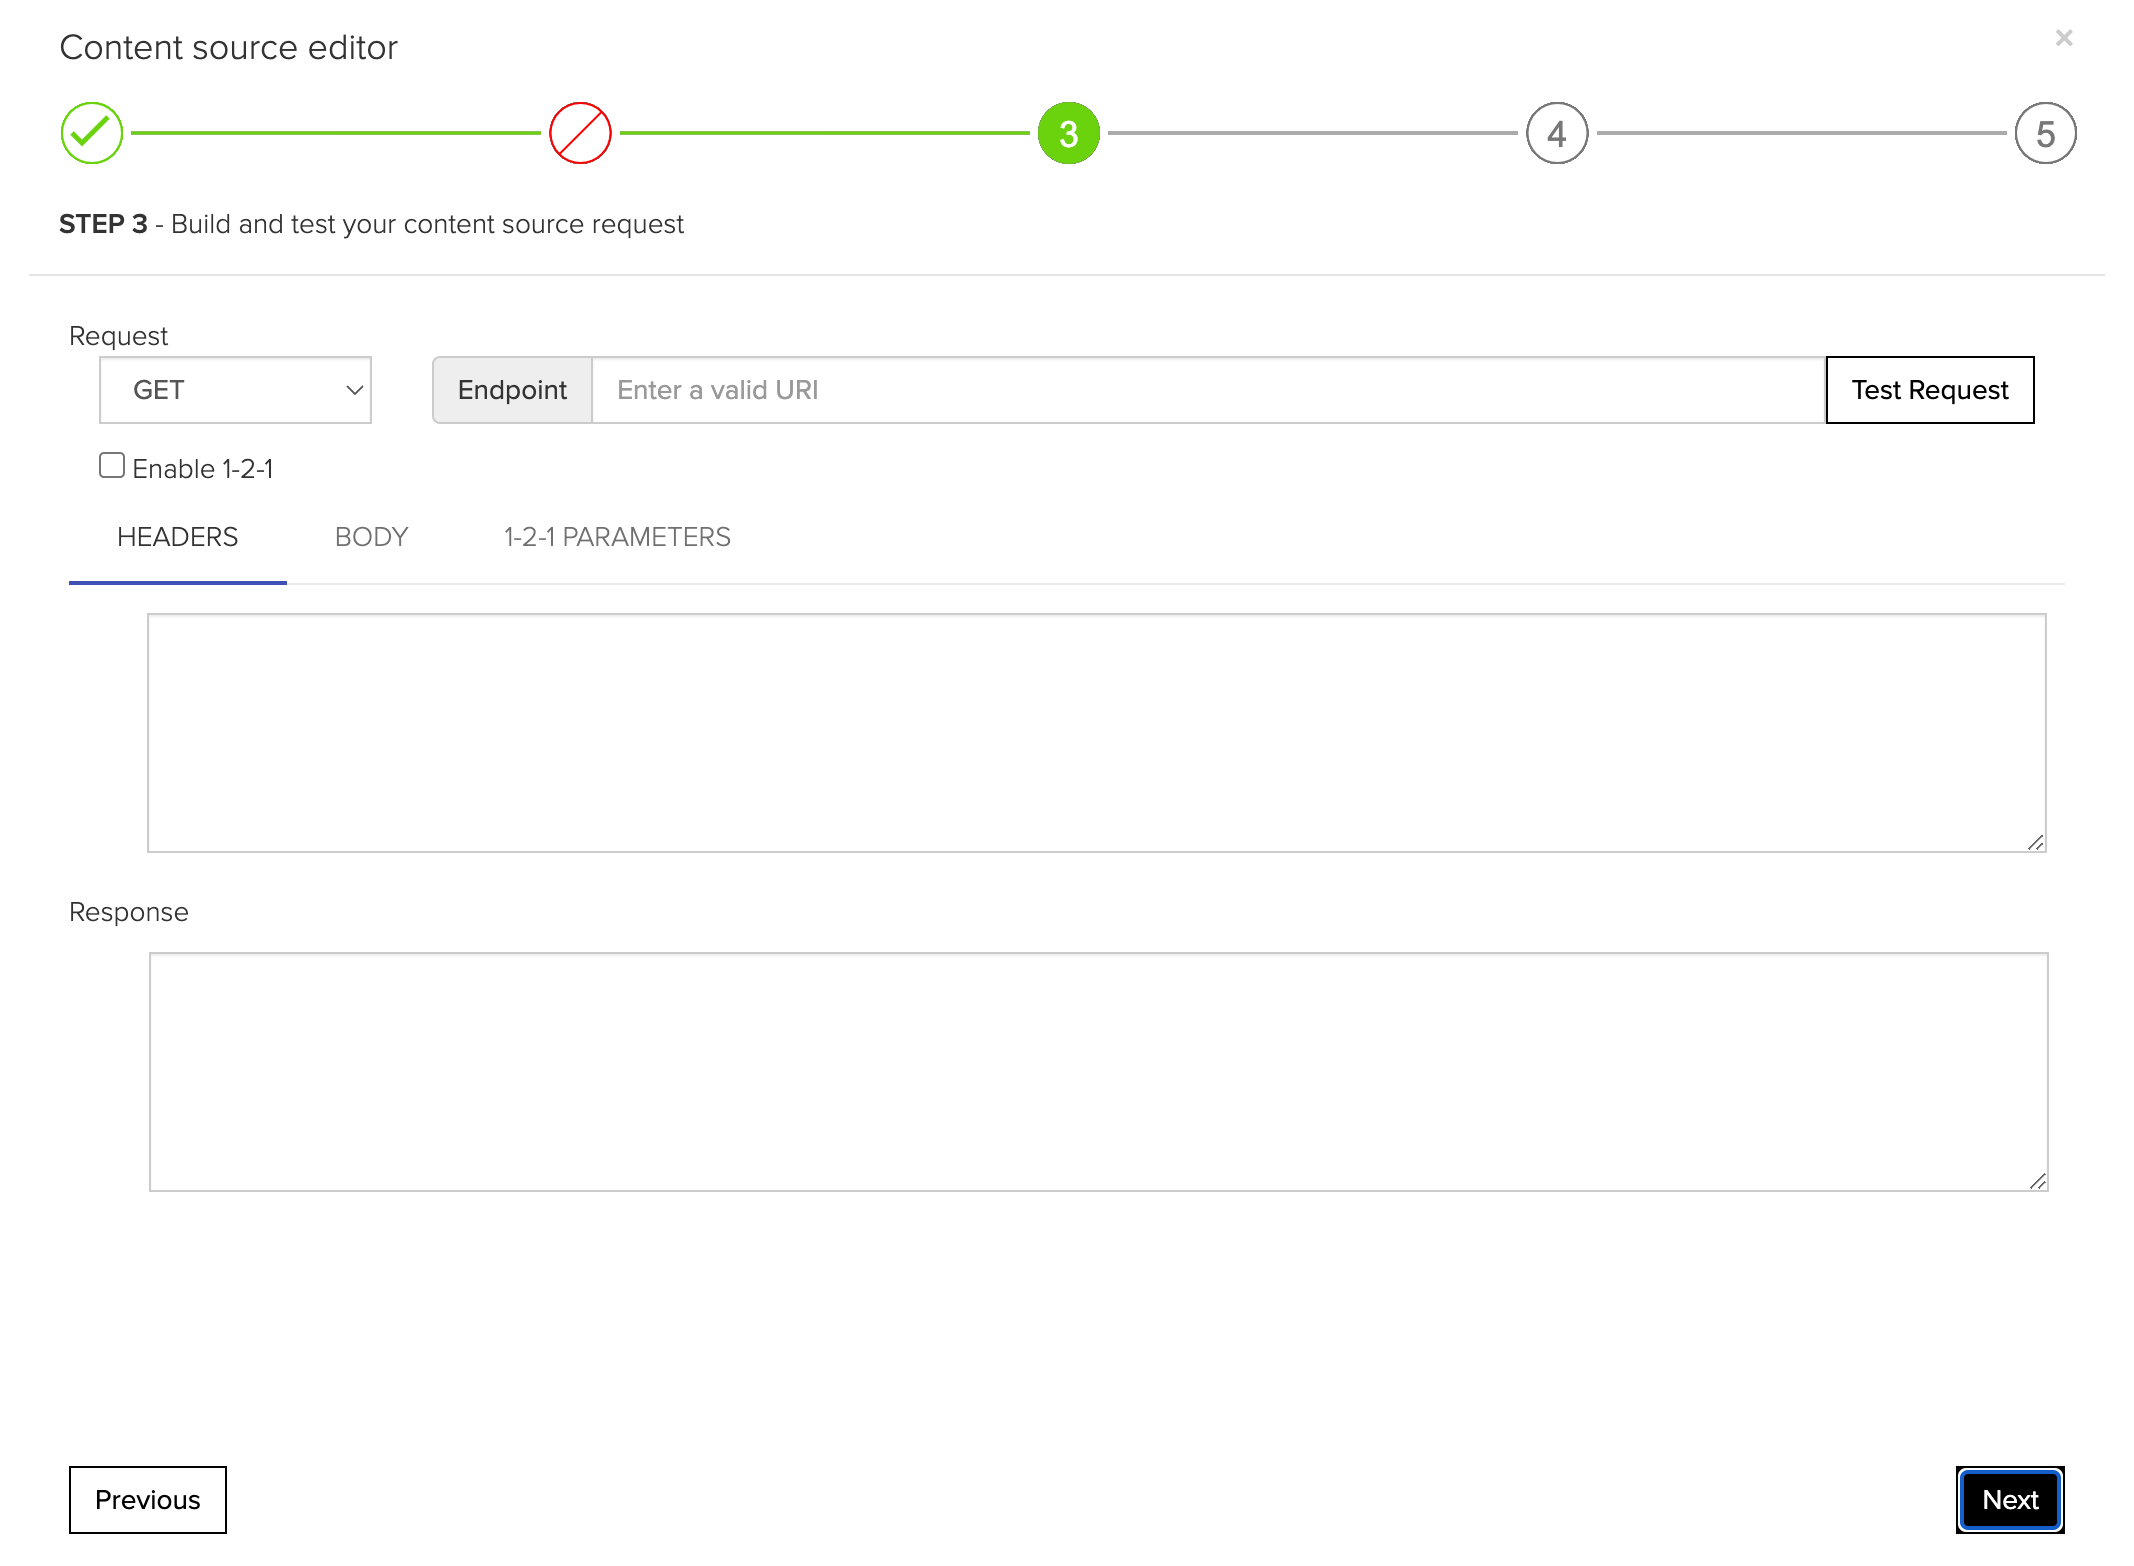
Navigate to Content Source on Litmus. This is a library area which contains all of your feeds. You can also add new content sources here.


Enter source code editor
Make any size adjustments to the code
Ensure you apply changes to dynamic image options
1.
2.
3.
Your personalized image is ready!
To make adjustments to the dynamic images
Back to beginning
Replace code with the code you copied
Go back to Litmus Personalize and copy the code for the next option
Repeat for all dynamic options
1.
2.
3.
Go to your ESP and select the poll placeholders
Next video
1. Enter your mailing name
2. Enter your Tag name
3. Choose from available templates
4. Add a URL for a landing page
5. Click - Generate Tag
6. Copy the code for each answer
Follow these steps to create a new mailing tag.
Next video
Step 3
Step 2
Step 1
Activate your personalized content
Step 3

Litmus Personalize integrates with ESPs and email builders.
Take a look at the example to see it in action ↓
It’s as easy as copying a simple HTML tag and adding it to any ESP or email builder.


See Mike's email
See Kate's email
See Brian's email
See Kate's email
See Mike's email
See Brian's email
Brian has been shopping for some athletic wear to help him get into better shape.
Mike is trying to decide between a jacket or a sweatshirt.
Kate has been wanting a new outfit for an event she is attending.
In this example, you can see how Brian, Mike, and Kate will all get their very own individualized email with their specific preferences in mind.
Merge CRM data & send email
Next, simply generate the HTML tag and add it to your email code. That one tag will generate as many personalized images as you’ve set, given the content and data merged.
Generate tag & add to HTML
Once your data source is connected, you’ll be able to create dynamic images, apply custom business rules, and create 1-to-1 experiences for every subscriber with a single HTML tag. This will be completely controlled by you so it can be designed with your brand standards in mind.
Create dynamic images
The Litmus Personalize platform can ingest any .csv, .txt, xml, or json file types. These files act as “Content Sources” that contain all the data required to design personalized elements for your emails. For example, your content source feed could include product details, availability, pricing, sale status, and other elements. If you’re in the B2B space, you could connect a feed that contains your top thought leadership content, popular events, and more.
Connect a content source
Learn how it works
Step 1
First, it’s important to note here that your customer’s PII is not stored with Litmus. It passes through and we do not collect or store your customer’s personally identifiable information.
Schedule a demo

We'd love to show you how our personalization software can make ever send more personal.
Let's talk about your personalization goals.

